
Paper Quilling Patterns
Free Quilling Patterns & Techniques
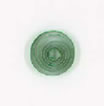
Tight
Coils |
|
 |
Peg: Roll a strip of paper on the quilling tool and give the end before taking it off |
 |
Bell or Cup: Roll a strip of paper onto the quilling tool and glue the end before taking it off. Then push up into a bell shape and glue the inside to help it keep it’s shape |
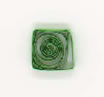
Closed
Loose Coils |
|
 |
Closed loosed coil: Roll the paper on the quilling tool then drop it onto the work board and allow it to uncurl for a while. Put a small amount of glue onto the end and hold gently for a few seconds until dry. It’s a good idea to make several like this before glueing. |
 |
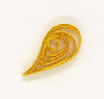
Teardrop: Start with a closed coil coil as above. After glueing, pinch one end to form a point and make the teardrop shape. |
 |
Eye: Start with a closed coil. After glueing hold between finger and thumb of each hand and pinch gently to form the eye shape. |
 |
Diamond: Start with a closed coil and pinch to form an eye shape (as above) but when pinching the ends, push the shape together so as to form a diamond. |
 |
Square:
Start with a closed coil. Lightly pinch just the outer ring or two
of the coil at opposite ends, then lightly pinch the other two sides to form a square. |
 |
Triangle: Start with a closed coil. Then make in the same way as the square (above) but pinch only three sides each a third of the way round the coil. |
 |
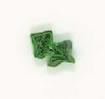
Leaf: Start with a closed coil, pinch the ends to make an eye shape and when holding between finger and thumb gently twist to form an ‘S’ shape or leaf. |
 |
Petal: Start with a closed coil. Pinch the top to form a teardrop and as you pinch, twist slightly to make a curved petal. |
 |
Oval: Start with a closed coil and squeeze the sides gently without pinching to flatten slightly into an oval. |
 |
Half Moon: Start with a closed coil and push one side in around a pencil or quilling tool handle. Lightly pinch each end of the resulting curve. |
 |
Heart: Start with a closed coil. Pinch at one end to form a point. Push the opposite end around a pencil to make the top of the heart |
 |
Holly: Start with a closed coil Pinch the coil around the centre with a pair of tweezers, then pinch and push each end towards the tweezers to make the six points. |
 |
Eccentric Coil: Start with a closed coil, pull the centre to one side and glue in place. This can be done using tweezers or placed on a board and held with pins. |
2007 Quilling Resources