
Paper Quilling Projects
Free Quilling Projects to get started
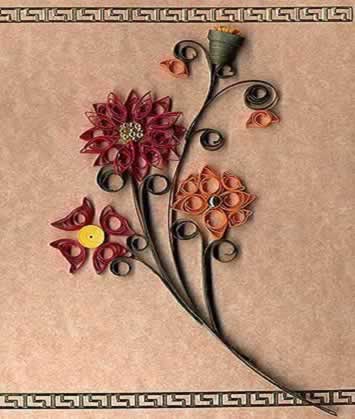
This card can be made easily after a short practice in making tight rolls and then loose roll shapes, teardrops, marquise and bunny ear shapes. Suitable for new quillers after practicing the basic shapes according to methods shown on here.
Quilling
Project Requirements ( usual quilling tools, scissors, glue,
seed beads for 2 flower centres, stickers for border if desired)
Paper strips 3mm wide :
3 strips (24 inch)- Deep green for the stem/scrolled ends and the bud.
2 strips ( 24 inch) Deep Yellow/Apricot for bunny ear shapes and teardrop
flower.
1 strip ( 24 inch) Pale yellow for tight roll red bunny ear flower centre
4 strips ( 24 inch) Deep red for main flower in marquise shapes and bunny
ear flower with tight roll centre.
Quilling Project Method:
1. (Tight roll) Roll entire length of pale yellow strip around a PCA quilling
tool ( needle or slotted) and glue the end to become the tight role for
flower centre
2. Main Red Flower- Marquise shapes: Make 16 loose rolls from the red
paper strips, each cut to a length of 6cm ( method described in loose
roll shape page) and allow to relax slightly before gluing end of each
one to make them all the same size. Pinch the shape at each end to form
the marquise shape in each case.
3. Bunny Ear shape red flower: With remainder of red paper strips, cut
into 10 cm lengths, make 4 loose roll shapes ( same size) and pinch them
into bunny ear shapes.
4. Deep yellow flower Teardrops and mini bunny ear shapes: Make 4 loose
rolls from deep yellow strips precut into 8 cm lengths... then pinch at
one end to make teardrop shapes. Make 5 loose rolls from remaining deep
yellow paper precut into 5 cm lengths and form them into small bunny ear
shapes.
5. Stems in deep green: For mail stem cut a strip 40cm long and fold it
over ( not in exact halves as you want the scrolled ends to finish one
lower than the other) and loosely roll the ends over in the opposite directions
to form the base for the main red flower head to rest on.
Repeat with smaller lengths as per pattern in same paper.
Construction Method in Your Quilling Project:
1.
To cardstock ( card front) adhere the pieces as per picture. The main
red marquise flower has 16 shapes. make a layer of 8 shapes, in a circle,
adhered directly to the card with a small amount of PVA glue on toothpick
and then let dry a little. top this with the second layer of 8 marquise
pieces by placing over the GAPS between each petal and secure with more
adhesive. Fill centre with small seed beads in a puddle of glue to make
the flower centre.
2. Using pattern (black and white pic) as a guide to relative placement,
adhere to the card about 2 cm South East of the main red flower, the 4
deep yellow teardrop shapes in a circle with ends pointing outward and
fill the centre gap with a glued on round bead as flower centre. The gaps
between the tops of the teardrop petals are then filled with the 3 small
deep yellow bunny ear shapes( see pic) The remaining 2 deep yellow bunny
ear shapes can be attached as "drops" when stem placement is
complete, near top of card.
3. Adhere tight roll (pale yellow) to card approx 2 cm South West of the
main red marquise flower and around it arrange and adhere the 4 larger
red bunny ear shapes as petals.
4. Stems: Arrange the doubled up strips ( glue their inner surfaces together
just leaving the scrolled ends free) as stems for the flowers as shown
in pic. Adhere the scrolls and the edges of the stems to the card as shown
with PVA glue, defining their final position on the card.
5. The Bud: Roll the remaining full length deep green strip into a tight
roll. Glue end down. Use a small end of a pen ( or similar) to gently
push out the middle of the shape away from the centre of the roll. Do
this evenly so that it forms a cone shape. Line the centre with a little
glue so it will retain it's shape. Fill this with a 10 cm strip of fringed
yellow paper that has been made into a tightroll and glued. It will peep
out of the top like a flowerbud.
The Bud section is optional if you have not covered the making of fringed
flowers yet, but does finish the card off nicely.
6. Stickers enhance the edge of the card, top and bottom but are of course
optional.
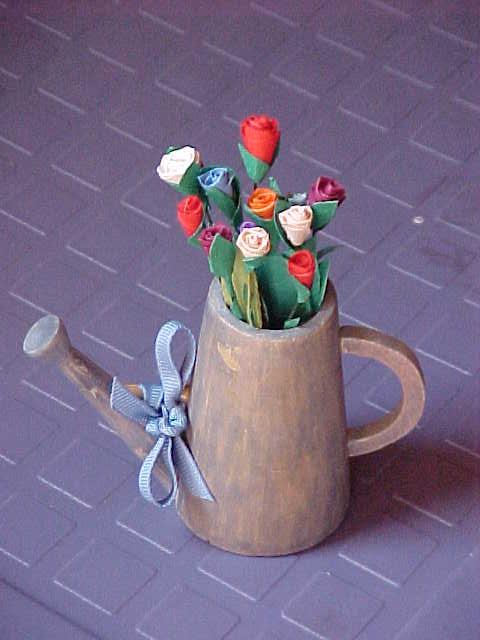
Photos of Paper Quilling Projects

2007 Quilling Resources